Written by Tony Lamb and James Hewes
At Nua Training, we’ve been running our business virtually for over a year now, along with many of our colleagues.
As a large proportion of businesses opt for hybrid working as the model of choice, switching to virtual delivery channels like video conferencing and online presenting is here to stay.
We often get asked about the best kit if you want to have a more professional set-up for those important presentations. So, in this blog, we’ll share our experiences, but also draw on those from James Hewes, who’s taken things to an even higher level.
James is the President of FIPP, the international media membership network, with members all over the world. Prior to Covid, FIPP had traditionally relied on physical events and conferences for the majority of their revenue, but last year had to make the rapid switch to holding virtual events. Impressively, and for less than £500, they managed to create a high-quality virtual experience and we would love to share some of their top tech tips with you, along with some of our own!
Studio Set-Up
The first thing you need to think about is your studio set-up, and top of the list is bandwidth. You need this for video quality purposes, so begin by testing your signal strength with one of the many available online tools. We’ve found over 20 Mbps download speeds to be reliable. If you’re still struggling or are too far away from the router to get that speed, try using an ethernet cable. It can be a life-saver option as it’s more reliable, and a lot easier than stopping everyone in the house using the Wi-Fi.
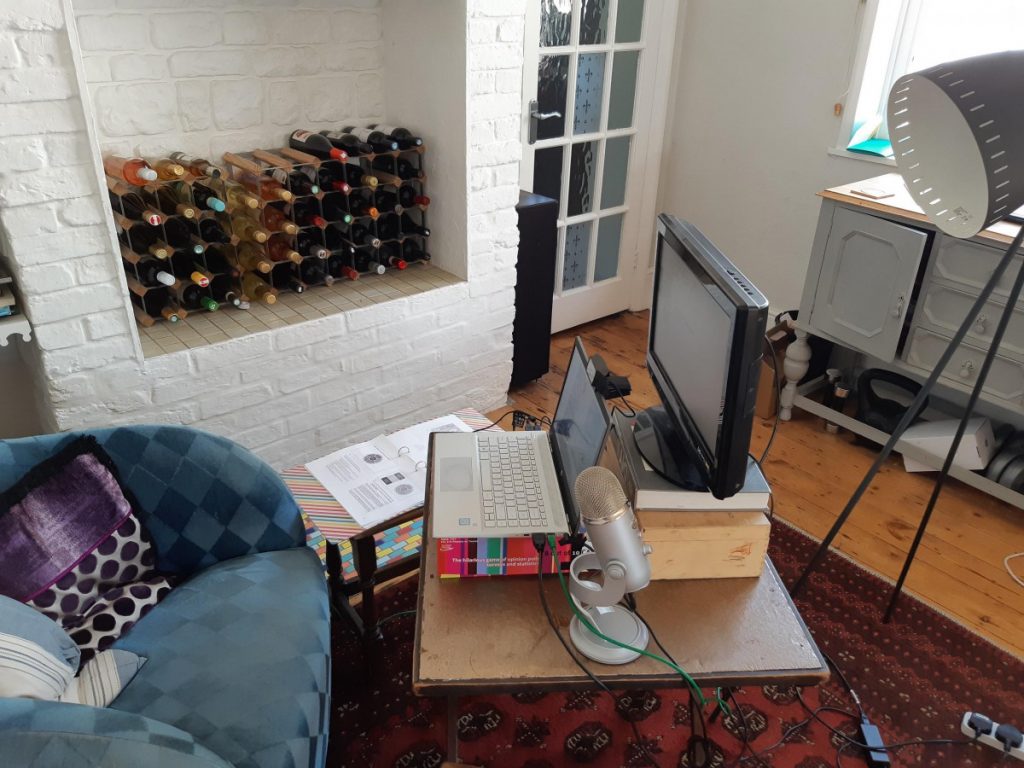
Our set-ups shown below, using a corner of the room near to the router, with everything to hand.
James has a more permanent set up for his webinars, where everything’s put in the same place each time so that it always looks the same.
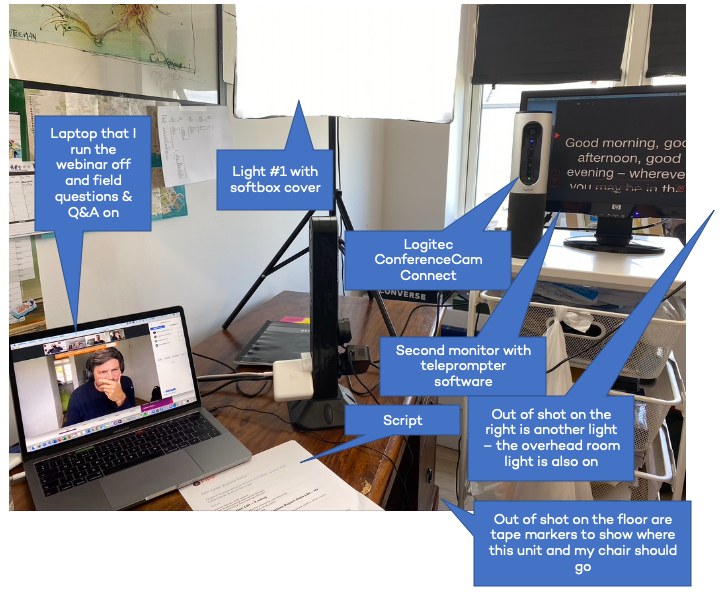
This is what it looks like on screen:
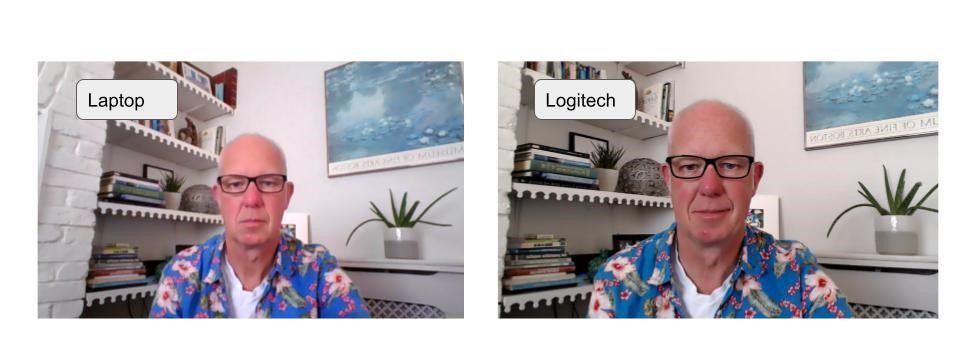
Camera(s)
Next up are cameras. We usually position our built-in laptop camera at eye height with books or boxes, so we can horizontally look into them. However, we have just bought a Logitech C920 webcam to test the quality and the flexibility around positioning scripts and screens, and as you can see, the quality difference is significant.
For James’ webinars, he uses a Logitech ConferenceCam which he already had. It’s a bit pricey but it has a remote control, a wide-angle lens and a built-in speaker and microphone (although you will also need an external mic too, see below).
Lighting
Another key consideration is lighting, so check how you look in a test video session. Light should come from behind the camera, therefore position yourself facing windows, as opposed to having them behind you. You will probably need your main lights on, but experiment with adjustable lamps, or even buy a ring light.
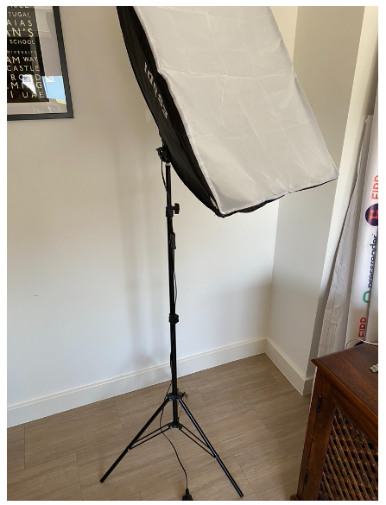
James bought a couple of free-standing lights from Amazon, with covers that diffuse the light. The difference is amazing:
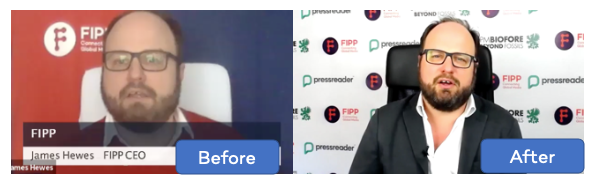
These cost about £50 and come complete with the stand and the bulbs.
Sound
The in-built sound on a laptop is ok, as is the one built into a webcam. At Nua, sound quality is obviously important for our training, so we use the YETI Blue microphone which can be placed on a table or used with a stand. This makes the sound a lot clearer.
The Logitec C920 also has a mic which sounds better than the laptop mic, so this provides a mid-level option.
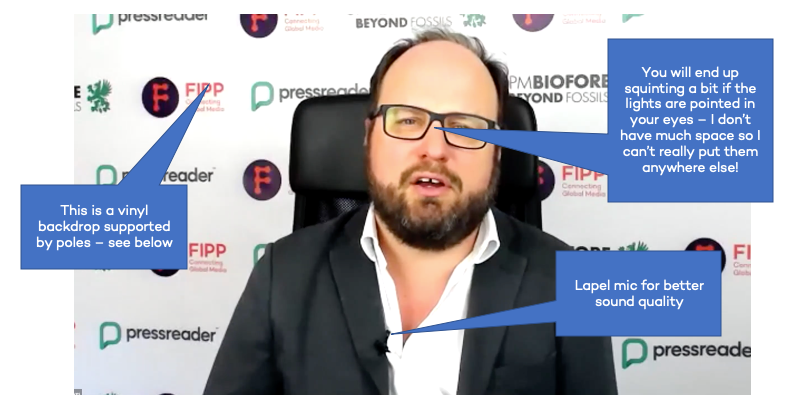
As a cheaper option, James uses a lapel mic, which plugs into your computer and also gives much better sound quality.
Backdrops and Visuals
Our experience at Nua Training is that for most video conferencing, it’s good for people to see you in your real environment, as it gives a more natural and authentic look. You’ll see a lot of wine near our set-up picture above. If that’s in camera view, it will always get a mention, but will people think I’m an alcoholic? Make sure your background is interesting, but not overpowering, and that no plants look like they’re growing out of your head.
Not everyone though has a suitable home space, so virtual background effects are an option, though you need a reasonably powerful device to limit image fragmentation at the edges between you and the background. We’ve found that the Microsoft Teams background blurring function also works well, and there’s a number of apps you can download for backdrops and visuals.
Green screens are a step up. You can create a DIY version and there’s a great YouTube video here that might help: DIY green screen. If you want to spend a bit more money, one that’s been recommended to us is the Homegear Pull-up Green Screen.
However, the most professional option is to get a vinyl backdrop made. These are inexpensive (about £40-50 each) and look a lot more professional. James uses an excellent company called Printed Today but there are many other suppliers. He also bought a backdrop stand to hang it from, which cost another £50.
Using a Script
Lastly, you will need to think about using a script. The challenge you have with a script is looking at the camera while you read it. The technique we use at Nua Training is to use the slides on ‘presenter view’ and have a second screen with the speaker notes on, raised above the camera (see our set-up picture). You need to make sure the speaker notes are suitably formatted, so you can quickly understand the essence of the content if you need to skip through some points.
If you prefer written notes, you can use a stand for them to raise them to the camera height, but it can look a bit clunky. It is though, always good to have a backup hard copy of the notes, just in case you have some random tech failures.
James uses a teleprompter which takes you to TV production levels. This is just a piece of software – he uses ‘Power Prompter’, which is available on the AppStore for about £40 – on a second monitor.
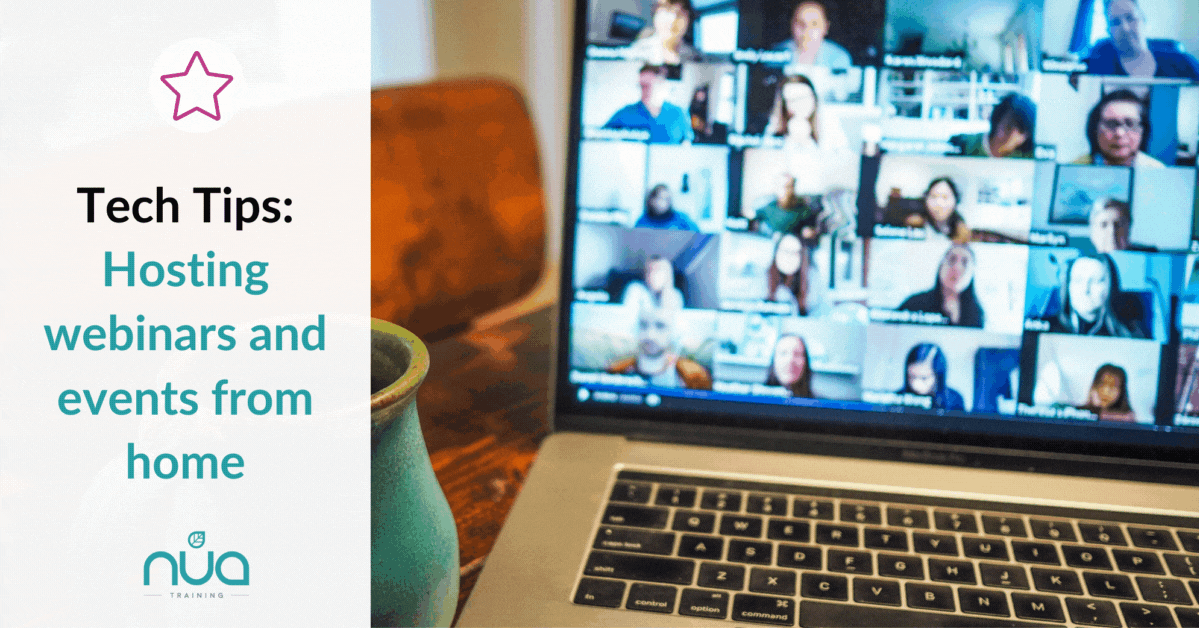
So when you are looking to host your next webinar or event from home, the bottom line is be prepared and get the right tech in place. With advance planning, testing and attention to even the smallest detail, things will run smoothly and you will keep your audience engaged and wanting more!
To find out more about our range of virtual presenting courses, visit: Nua Training Presenting Courses